
Picking
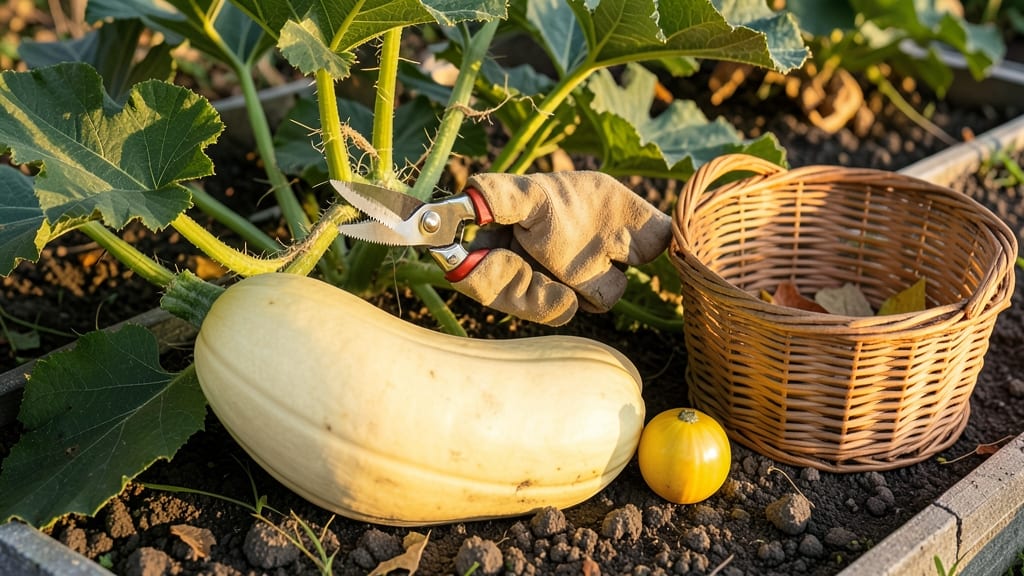
To pick spaghetti squash from your garden at the perfect moment means the difference between tender, noodle-like strands and tough, stringy disappointment.
I’ve watched my 🎃 spaghetti squash go from vibrant green to dull yellow, only to realize too late that a few more days would’ve made all the difference. The key? Knowing when the skin turns hard and the stem dries out—signs that signal it’s time to harvest before frost hits.
In this guide, I’ll walk you through the three foolproof signs your squash is ready, plus how to test ripeness with just your thumb. No more guessing—just delicious, restaurant-quality results every time.
You’ll also learn the best time of day to harvest for maximum flavor and how to store your squash so it stays fresh for weeks. Let’s get started!
3 Key visual signs your spaghetti squash is ready for harvest
Harvesting spaghetti squash at the right moment transforms it from a tough, fibrous mess into the tender, noodle-like delicacy you crave. Overlooking ripeness signs means wasting time and effort—while picking too early results in bland, underdeveloped flavor.
The good news? Three simple visual cues will tell you exactly when to grab your pruners and harvest.
I’ve learned the hard way that waiting for these three key indicators makes all the difference between a disappointing harvest and a garden-fresh feast.
Whether you’re a seasoned gardener or trying spaghetti squash for the first time, these signs will save you from common mistakes like harvesting too soon (when the flesh is still green and tough) or too late (when the squash becomes woody and inedible).
Mature spaghetti squash abandons bright green for a matte, yellowish hue. This change signals the starches inside have fully developed. Pro Tip: Avoid harvesting if the rind still has green patches—it’s not ready!
A woody, brown stem means the squash has stopped growing. If you can easily snap it off (rather than twist), it’s prime for picking. Warning: A green, flexible stem means more growing time is needed!
Healthy vines signal a still-growing squash. When you notice yellowing leaves or wilted foliage, it’s time to act. Exception: Some varieties keep green vines—always check the rind first!
One mistake I used to make was harvesting based solely on size—but a large squash isn’t necessarily ripe! I’ve seen squash the size of basketballs with green rinds and underdeveloped flesh. Always prioritize the rind’s color and texture over guesswork about size.
For example, a squash with a dull yellow rind that’s hard to pierce with your thumbnail is far more reliable than one that’s just "big enough."
Another trick I’ve picked up from fellow gardeners is the "tap test". Give the squash a firm tap with your knuckle—if it sounds hollow and deep, it’s ready. A dull, thud-like sound means it needs more time.
This method works especially well for heirloom varieties, which can vary in ripening speed. Pair this test with the visual cues above for foolproof results.
Timing your harvest also depends on your local climate. In cooler regions, spaghetti squash may ripen more slowly, so monitor the frost forecast. If a light frost is predicted before your squash reaches maturity, harvest it slightly underripe and let it ripen indoors in a warm, sunny spot.
Just avoid heavy frosts—damaged squash won’t store well.
Once you’ve confirmed ripeness, use a sharp pruner or knife to cut the squash from the vine, leaving a 1-inch stem attached. This prevents bruising and extends shelf life.
After harvesting, cure your squash by placing it in a warm, dry spot (like a sunny windowsill) for 3–5 days. This hardens the skin, improving storage longevity.
Properly cured squash can last 2–3 months in a cool, dark place—like a basement or garage. If stored correctly, the flavor will intensify over time, making it worth the wait. Just avoid refrigerating until you’re ready to use it, as cold temperatures can shorten shelf life and dull the flavor.
Remember, every spaghetti squash plant is unique. Some varieties, like 'Golden Delicious', ripen faster than others, such as 'Honeynut'. Always check the seed packet or plant tag for variety-specific tips.
By mastering these three visual signs, you’ll never second-guess harvest time again—just delicious, restaurant-quality squash straight from your garden! 🎃
How to test spaghetti squash ripeness: the thumb-tap method
When your spaghetti squash reaches the perfect ripeness, the flesh transforms from tough and fibrous to delicate, noodle-like strands—but only if you harvest at the right moment. The thumb-tap method is my go-to trick for testing maturity without guessing.
This simple physical test helps you avoid both underripe squash (which stays green inside) and overripe squash (which turns rubbery). Let’s break down how to use it correctly, including how different varieties respond.
Before you tap, check the skin color and stem condition. A ripe spaghetti squash will have a dull yellow rind (not bright green) and a dry, brown stem. But the thumb-tap method gives you the final confirmation.
It’s especially useful for heirloom varieties or when growing in less predictable climates, where timing can be tricky. Ready to test? Grab your squash and follow these steps.
Pro tip: Harvest in the morning when temperatures are cooler. This reduces stress on the plant and helps the squash store better. After picking, let it cure in the sun for 2-3 hours to toughen the skin and extend shelf life.
Store in a cool, dry place (like a pantry) for up to 2 months.
If you miss the window and the squash sits too long, the flesh will turn grainy and dry. But don’t worry—you can still roast or bake it for a heartier texture.
The thumb-tap method is foolproof once you practice it, and soon you’ll be harvesting perfectly ripe spaghetti squash every season. Happy gardening!